

Testing proves a design works. Quality control is what keeps every unit identical to the one that passed. In heated apparel the two are not the same job: a garment can be correctly designed and still ship with a cold zone, a reversed connector or a battery that was never charged before packing. This checklist walks through the four control points on a heated apparel production line — incoming material, in-process, final product and shipment — and what to verify at each one.
Why Heated Apparel Needs Its Own QC Process
Heated apparel carries two risk profiles at once. As a garment it has the usual sewing, sizing and fabric faults. As an electrical product it adds wiring, connectors, heating elements, a control board and a lithium battery pack. A defect in the second category is rarely visible on the outside, and it does not show up in a fabric inspection.
That is why a general sewing-line QC routine is not enough. The electrical assembly has to be checked at the point it is made, not only at the end, because a fault buried inside a garment is expensive to reach once the shell is closed. A factory that manufactures its own heating elements and controls its own battery assembly can inspect each layer as it is built. A factory that only assembles bought-in modules can inspect the finished unit and little else.
Stage 1: Incoming Material Inspection
Everything downstream is limited by what comes in. Incoming inspection covers three material families.
- Heating elements and wire. Check resistance against the specification, confirm the insulation is intact, and verify the element layout matches the approved design. A batch of elements with resistance outside tolerance will run hot or cold regardless of what the control board does.
- Battery cells and packs. Verify the pack model, capacity marking and connector type against the purchase specification, and confirm the batch traceability record. Cells are the highest-value component and the one most often substituted without notice.
- Textiles and hardware. Check fabric weight and colour against the approved swatch, confirm zips, buttons and reflective trim, and inspect for shrinkage or contamination. For waterproof styles, verify the membrane and seam tape before the first cut.
The output of this stage is not a pass or fail — it is a record. Each batch should be logged with the item, supplier, quantity, inspection result and the person who checked it.
Stage 2: In-Process Inspection
In-process checks happen while the product is still open and repairable. This is where most of the cost is saved.
- Element placement. Confirm the heating element sits in the approved position — the right zone, the right height — before the lining is closed over it. A mislaid element cannot be corrected later without opening the garment.
- Wiring and strain relief. Check that leads are routed away from flex points, that the strain relief at every exit point is seated, and that connectors are latched correctly. Pull-test the battery lead as a routine step, not as an exception.
- Solder and crimp joints. Inspect joints for cold solder, excess flux and correct crimp height. On the electrical sub-assembly this is a visual check plus a continuity test.
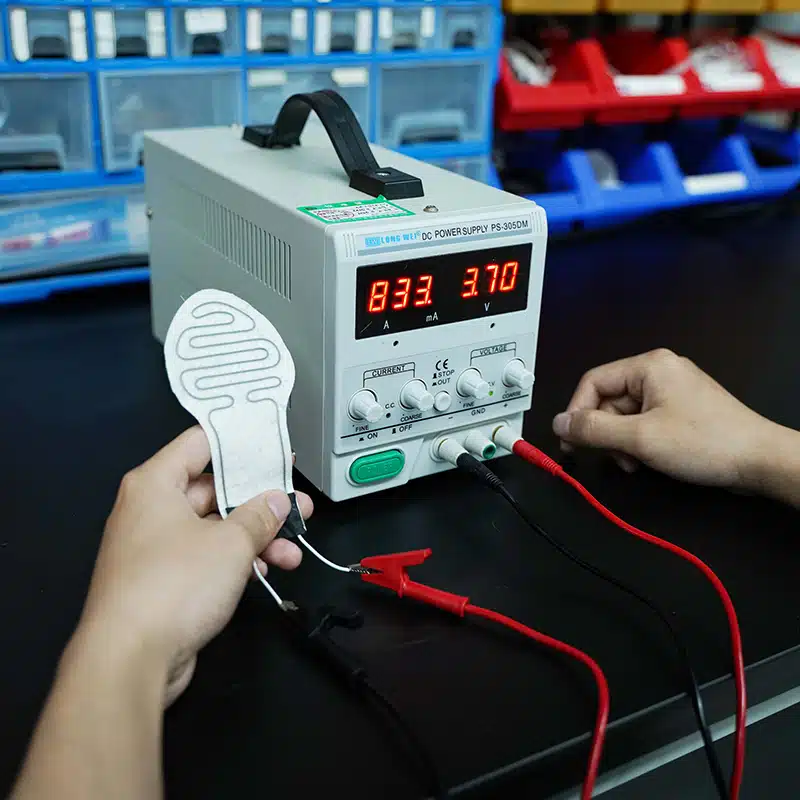
- Control board and function test. With the element connected, power the unit and confirm it heats, that the LED indicators respond, and that each heat level is reachable. Reject any unit that heats unevenly at this stage — it will not improve on the shelf.
- Stitching and construction. Check seam integrity at the connection points, pocket alignment and the fit of the inner lining around the wiring channel.
Stage 3: Final Product Testing
Final inspection is a functional test on the completed, charged unit. It is the check most buyers ask about, and the one where answers separate a real system from a claim.
- Full function test. Power on, step through every heat level, confirm the LED or app response, and hold the unit at the highest level long enough to confirm the element reaches its target temperature rather than merely drawing current.
- Temperature verification. Measure the surface temperature of the heating zone and confirm it stays within the designed band. Overheating protection and thermal cut-off behaviour should be verified on a sample from each batch or each production run.
- Waterproof check. For IPX4-rated and IPX5-rated styles, test the seam protection and connector sealing. Confirm the rating that applies to the exact style, not to the product family.
- Battery pack check. Verify the charging cycle, the protection board behaviour and the charge cut-off, and confirm the state of charge before packing. Discharge and short-circuit protection should be evidenced by the pack’s test record, not assumed.
- Cosmetic and label check. Confirm branding placement, care labels, warning labels and the battery specification sticker match the approved artwork.
The result of this stage is a per-unit record. A factory running 100% functional testing will have a test log for every unit that ships, not a sample report from the start of the order.
Stage 4: Packaging and Shipment Checks
The last defects are introduced after the product is finished, so shipment checks are part of QC, not logistics.
- Pre-shipment charge level. Lithium packs ship at a controlled state of charge for transport. Confirm the packing procedure matches the transport requirement and that the pack is not left fully charged.
- Accessory and documentation audit. Check that the correct charger, cable, manual and any regulatory insert are in the box, in the right language for the destination market.
- Carton and drop check. Confirm the carton specification, the label content and barcode, and run the agreed drop test on the packed carton for the shipment.
- Quantity and traceability. Reconcile the packed quantity against the order, and confirm the shipment can be traced back to the material and production batches recorded in stages 1 to 3.
The Heated Apparel QC Checklist
Brought together, the four stages form a single checklist that runs alongside production:
- Incoming: element resistance and layout · battery model and traceability · fabric and hardware against approved sample · inspection record logged
- In-process: element position · wiring routing and strain relief · joint quality · live function test · stitching at connection points
- Final: full function test · temperature verification · waterproof check per rating · battery charge and protection · labels and cosmetics
- Shipment: state of charge · accessory and manual audit · carton and drop test · quantity and batch traceability
At Dr. Warm we have manufactured heated wearables since 2013 and run these checks across our own heating element production, our electronics workshop and our final assembly lines. Every unit receives a full functional test before it is packed, and each batch is recorded so an order can be traced from the battery pack back to the incoming inspection that released it.
For how we verify safety and overheating protection in the laboratory, see how we test heated clothing for safety. For the pre-production testing that happens before a single unit is made, see testing heated apparel before mass production. For the facilities and lines these checks run on, see our heated apparel factory.
Want this as a working document for your own supply chain? Ask for the full QC checklist through our OEM and ODM services page and we will send it with the inspection stages mapped to your product category.
Frequently Asked Questions
What is checked in heated apparel quality control?
Four stages are checked: incoming material such as heating elements and battery packs, in-process work such as element placement and wiring, the finished unit through a functional and temperature test, and packaging before shipment. The electrical checks matter most because a fault in the heating circuit or battery is not visible from the outside.
Do heated apparel factories test every unit or only samples?
A capable factory does both. Functional testing and the battery check are best run on every unit, while destructive and laboratory tests such as drop tests and waterproof verification are run on samples from each batch. Ask which checks are 100% and which are sample-based, and ask to see the log for both.
Why is in-process inspection important for heated clothing?
Because the heating element, wiring and connectors are sealed inside the garment. Once the lining is closed, a defect can only be found by opening the product again. Inspecting the element position and the electrical joints while the garment is still open is cheaper and more reliable than catching the fault at final testing.